Breadboards vs. protoboards vs. PCBs #
There are three major ways to build electronics:
- solderless breadboards, like you have in your project kit
- protoboards, which are printed circuit boards with a generic grid of useful holes
- printed circuit boards (PCBs)
- (plugging together components with connectors, but that’s more assembling than building, I would say)
Breadboards #
In the days of yore, when electronic components were big and bulky, we used to prototype by screwing components down to a piece of wood, like a wooden cutting board you would use to cut bread. Hence, “breadboarding.”
Now, we use solderless breadboards. The modifier “solderless” is just to distinguish them from protoboards, which are like breadboards, but need solder for assembly.
Here are a few facts about breadboards that are not immediately obvious.
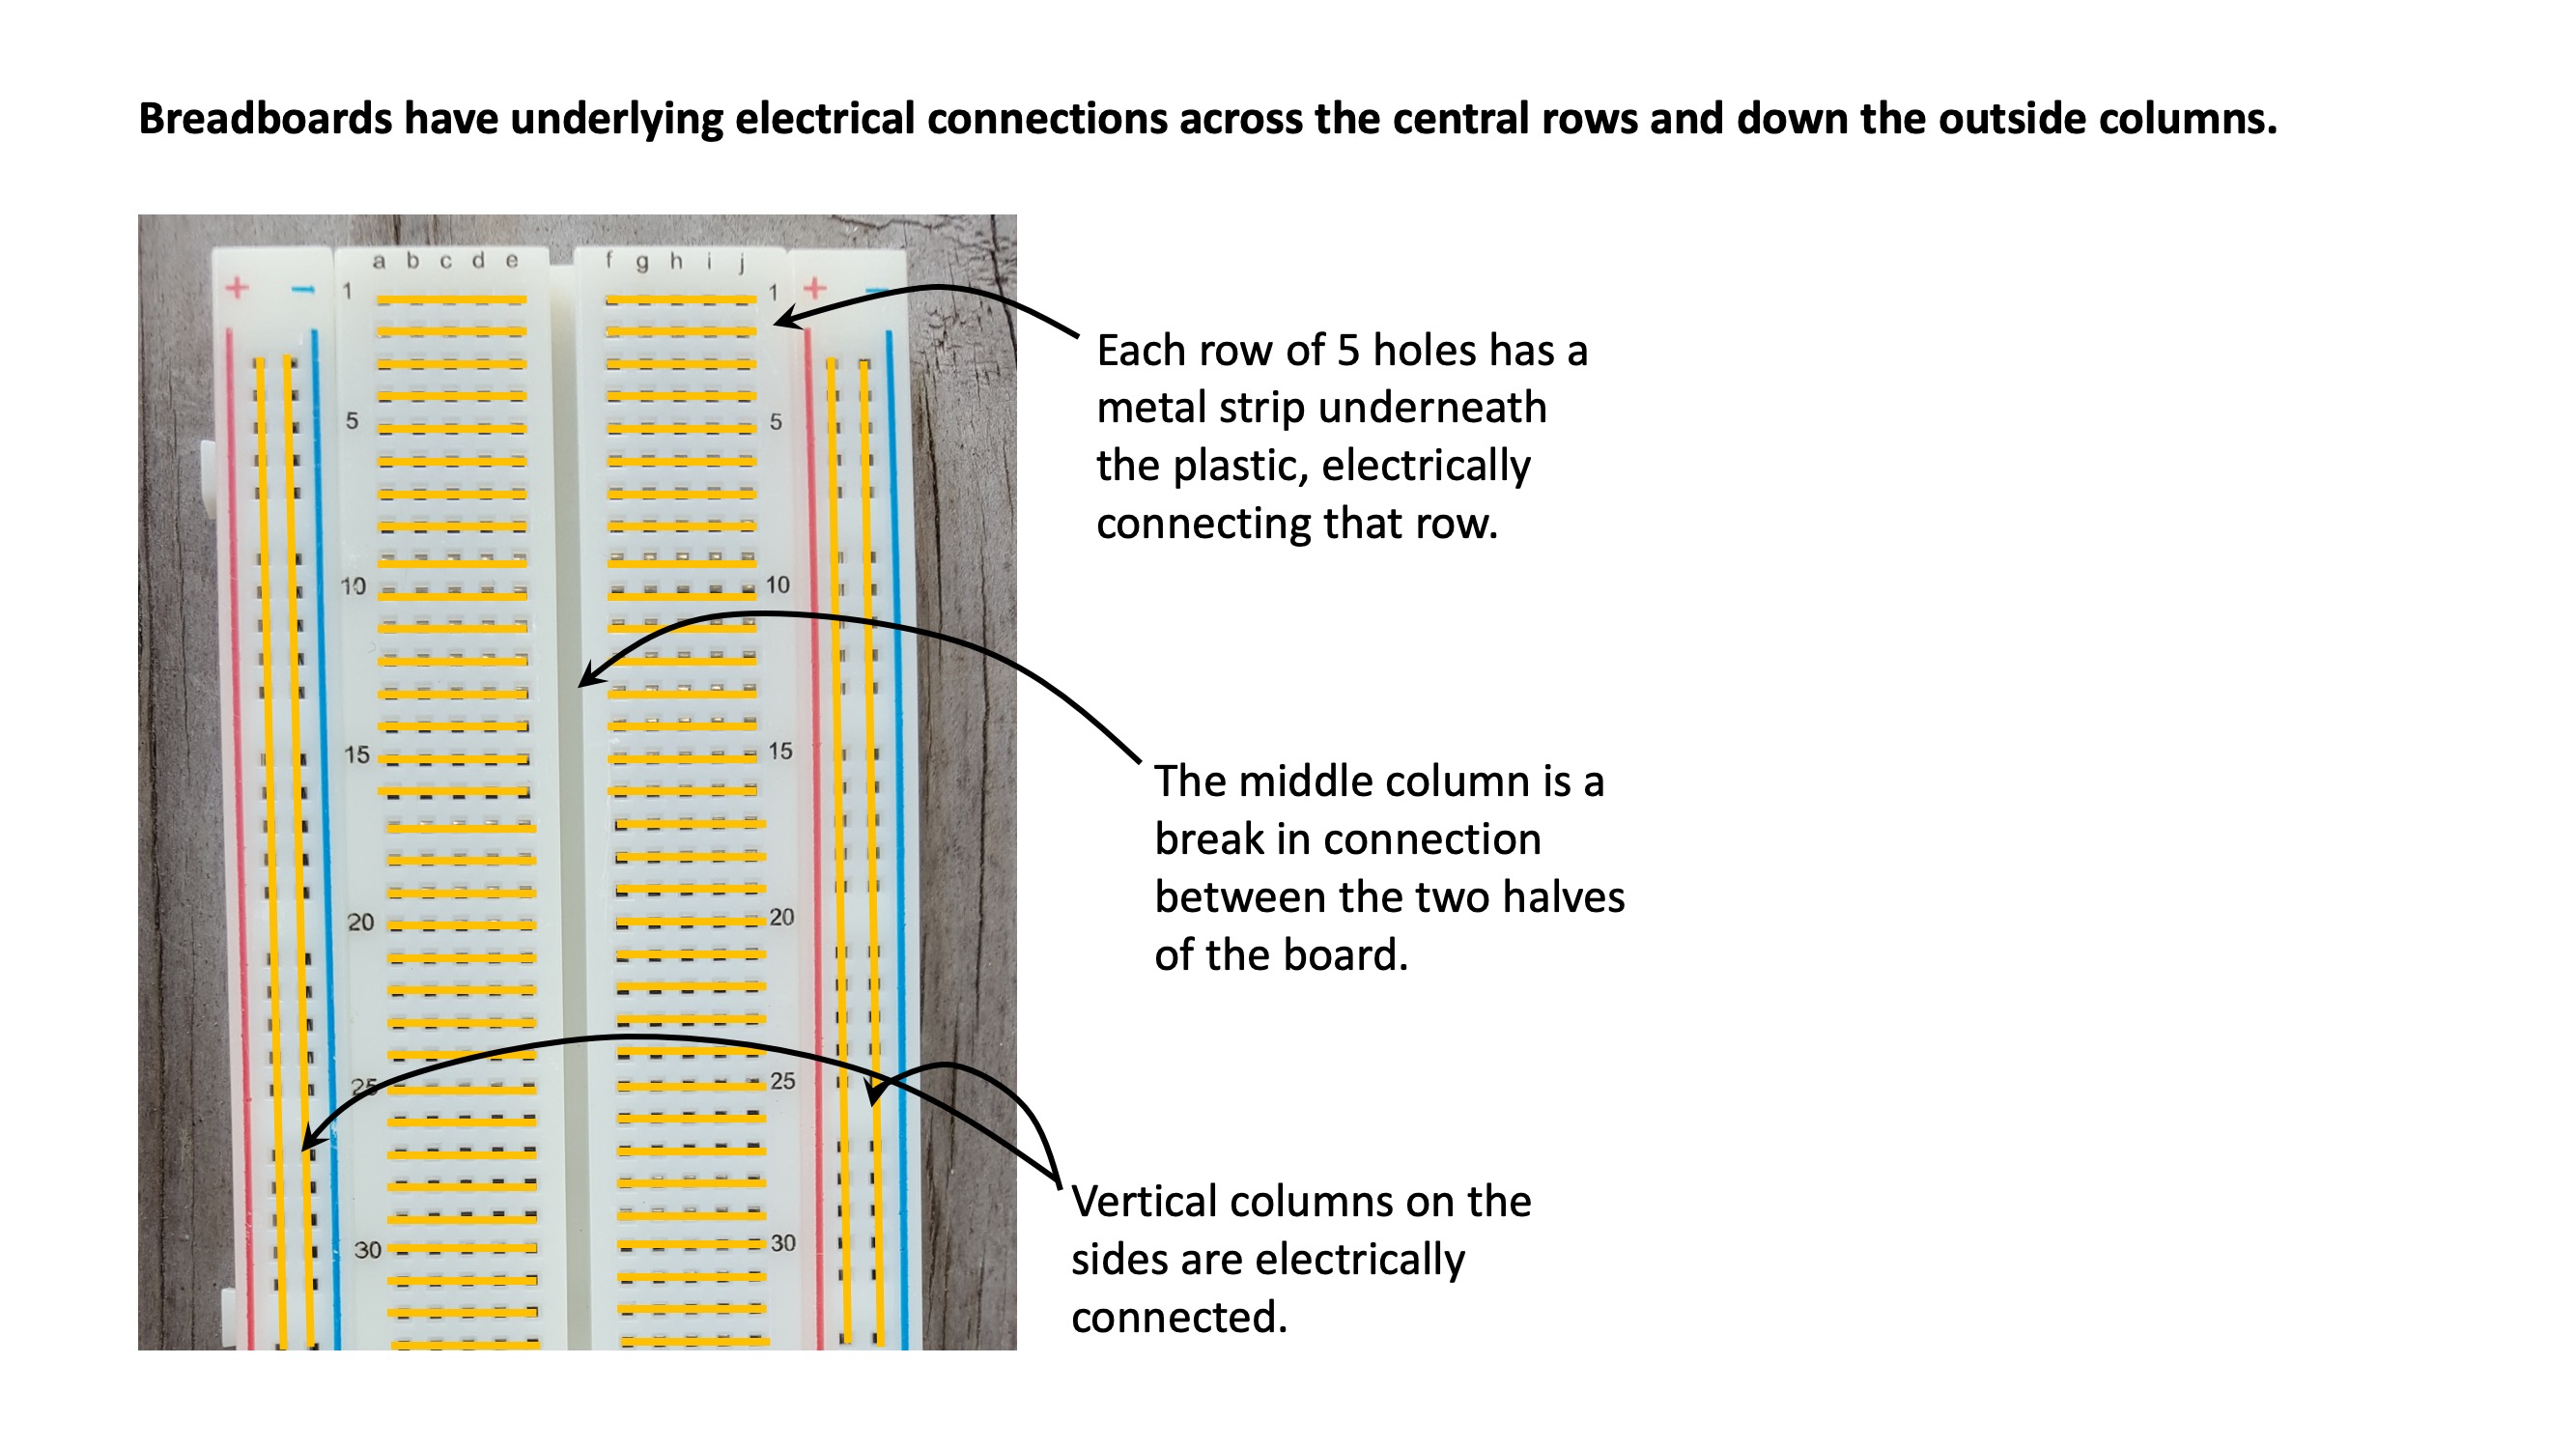
- Each row subsection of 5 pins is connected together, but the two 5 pin subsections are not connected across the central groove.
- The groove is there so that you can plug chips across it and have each pin hit a different group of 5 pins.
- The columns marked with red and blue along the sides are usually used for power and ground. Each column is connected to the rest of itself, but the columns are not connected to each other. It’s common to run wires at one end of the board to connect the red column on the left to the one on the right, and same for the blue columns.
- If you stick something really fat into the holes, like a screwdriver or a big diode leg, you might damage the connection inside.

This video demonstrates prototyping a simple LED circuit, powered by laptop power routed through an Arduino’s Vcc output pin. Your KB2040 3.3V output pin is similar to the Arduino Vcc output pin.
Protoboards #
Once you have a breadboard prototype that works, the next step is to make something less fragile. Sometimes people skip straight to a printed circuit board, but if you only need to make one device, a protoboard can be a faster, robust solution.
Printed circuit boards #
PCBs are just sheets of fiberglass with copper wires printed on them, along with holes to connect components. They’re a big deal, so you can read the details in the PCB section coming soon to this website.
General thoughts on prototyping #
The general conception of a prototype is an incomplete version of something, built hastily out of cheap materials, like building a foam-core model of a robot before building the real thing. You build a prototype, and then when you’re done, you build the real thing.
Lurking in this conception is a trap that you should avoid, a trap that is particularly alluring to smart, busy college students. The trap is that it seems like you could just skip the prototype and get on to the final version sooner, thereby saving time.
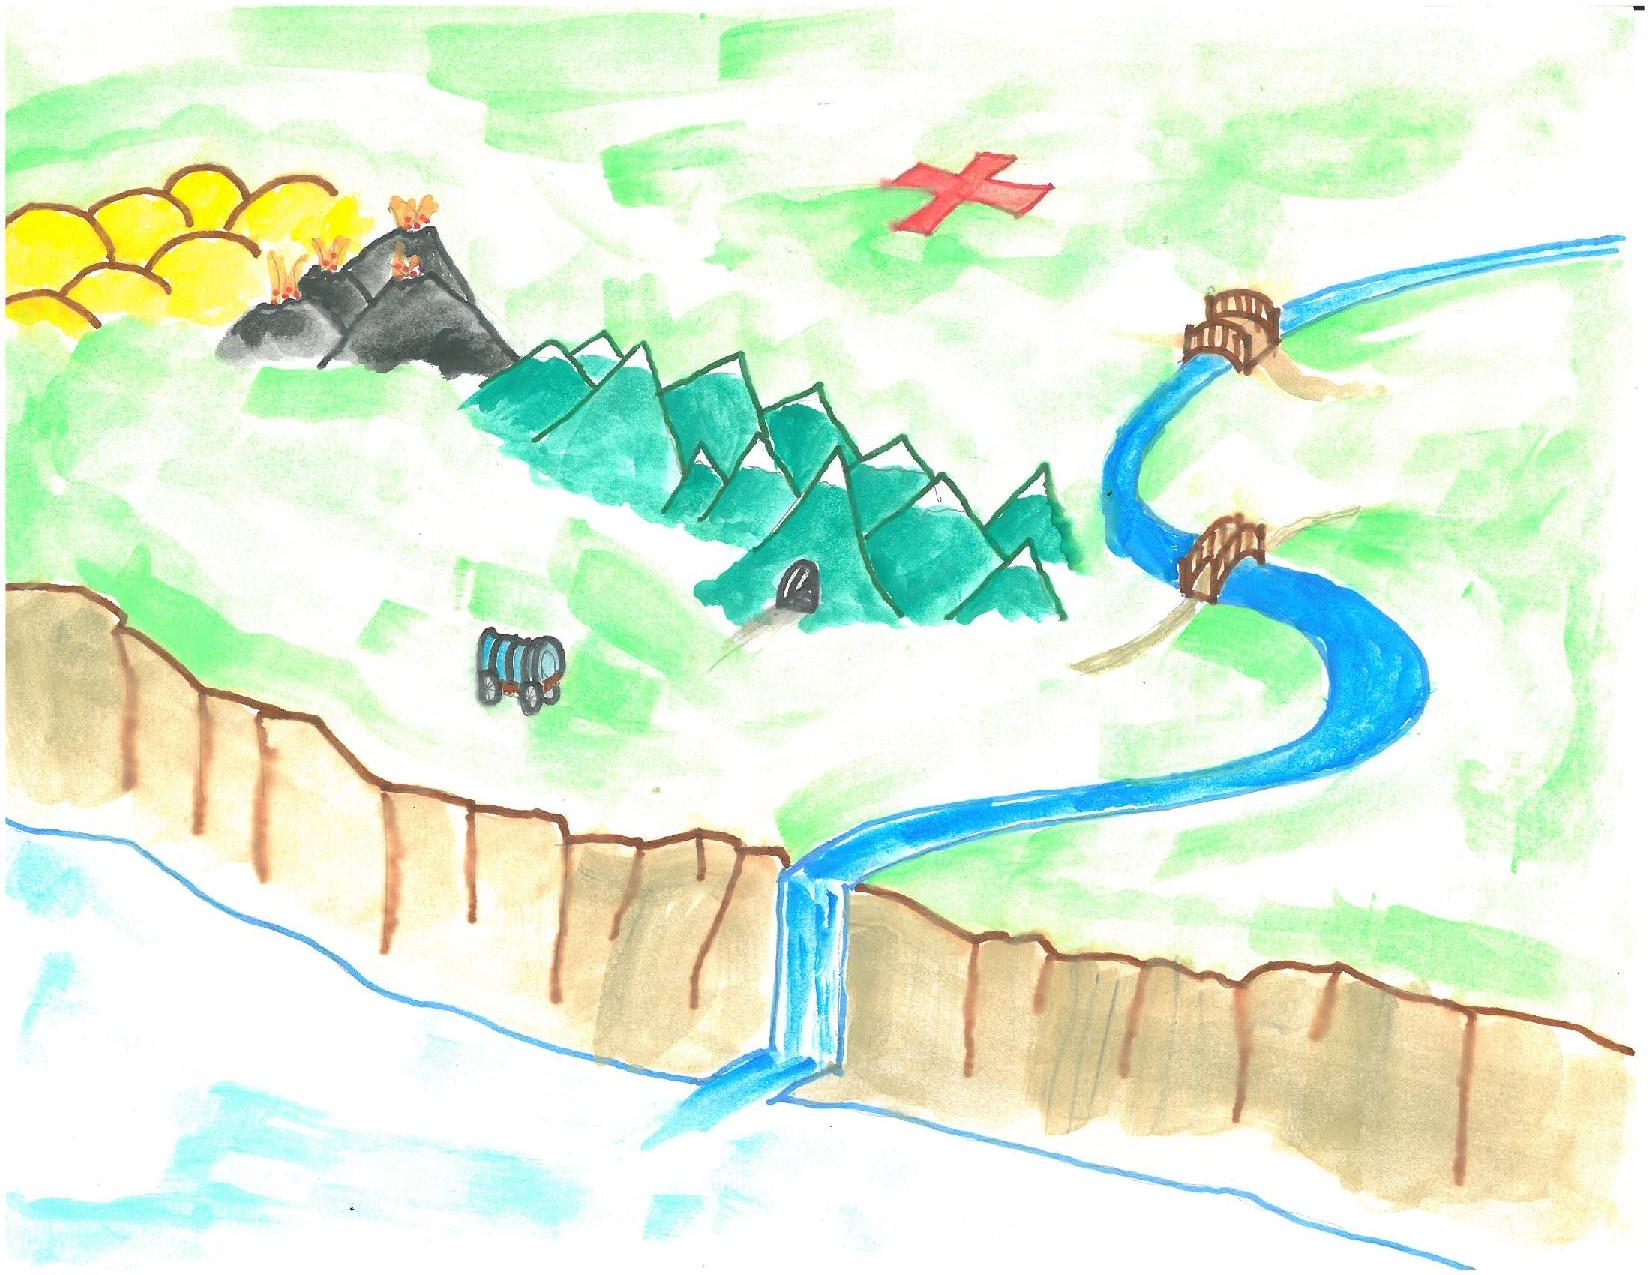
But that’s not right. Here, look at this picture I painted for you.

This is what prototyping is like. You’re trying to get the wagon to the promised land where the treasure is buried under a big red X. You might be able to drag the wagon across the two bridges. You might be able to go through that tunnel in the mountains. Maybe you can squeeze between the sand dunes and the volcanoes.
The one thing you should obviously not do is to pick a direction with no idea where it leads and then roll as fast as possible in that direction. That’s what you’re doing when you try to build the final version first.
Instead, you want to identify risks and then do tests to mitigate them. For example, maybe the wagon won’t fit over the bridge. You could measure the wagon, and then measure both bridges. Maybe there’s swampy area where the wheels will bog down. You could try dragging a wheel through the mud and see how much it sank under different weights. Maybe the tunnel is filled with lava. You could try a throwing piece of the material your wagon is made of into the tunnel, and see if it is burned into ashes.
Prototyping is about identifying risks in a design and then building something to test and mitigate those risks. You build prototypes to help you improve the design; a series of quick, smart prototypes gets you to a good design faster than skipping to a “final” design that has never been tested in the real world.
“Everyone has a plan ’til they get punched in the mouth.” –Michael G. Tyson
There are lots of different kinds of prototypes that you can build. In the mechanical realm, it could be cardboard, foamcore, wood, or the like, fashioned into roughly the right size and shape. In the electrical realm, it could be a microcontroller like an Arduino or Raspberry Pi connected to a breadboard with jumper wires, all stuffed in a box. In software, it could be a fake user interface, made in Photoshop or Balsamiq Mockups, or a test harness written just to test an algorithm. In each realm, there are also deeper levels of prototyping.
Here are some more examples.
- Test a mechanism: a gear train, a latch, a fixture
- Test a thermal system: test something in a freezer or an oven
- Test an aesthetic direction or enclosure shape (3D printers are great for this)
- Test a mechanical property that isn’t generally available with much precision, like shear modulus (unlike tensile modulus, which is more precisely known)
- Test a material to see if its mechanical (or electrical, thermal, chemical…) properties meet your needs
- Test fatigue life by building a load cycler
- Test a coating’s durability under real-world conditions
- Test the tolerances on an assembly by making a few test cuts to see how much your parts vary
- Test a user interface or experience
- Test one step in a multi-step process, e.g. rather than machining a fancy part before you use electrical discharge machining (EDM) on a critical section of it, just test the EDM on a flat plate
- Test an assembly or maintenance procedure, i.e., “Let’s check if this thing would even fit in the access port before we start machining the titanium.”
Also, here’s a watercolor my daughter made for you.
